Assembly tips for Sapphire Plus 3D Printer - Step 3
Step 4: Mounting the Z lead screws
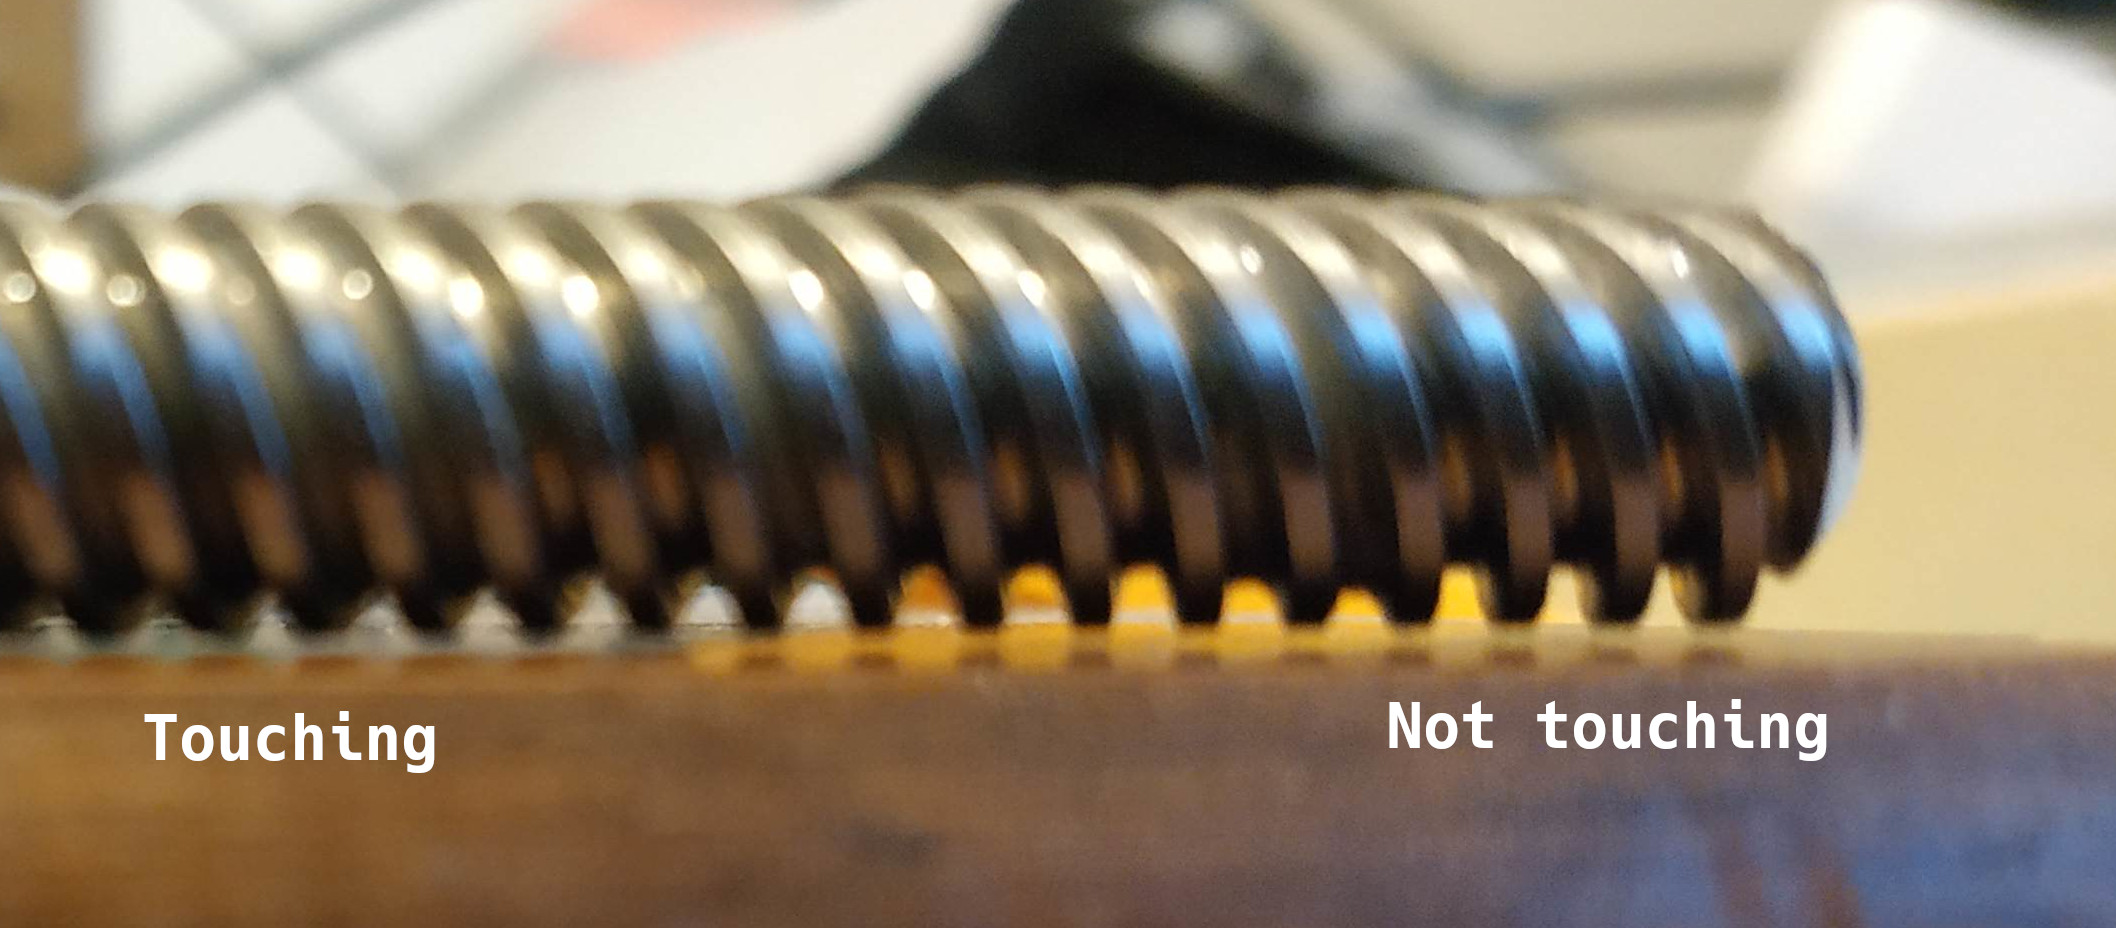
Before mounting your Z lead screws, you should check their planearity. Mine wasn't planar so you need to get a new one if it happens for you. To inspect your screws, please roll them on a flat surface, like your desktop, and observe if they touch on the complete length, whatever the rotation. One of mine was perfect, while the other was slightly lifting up, as seen the next picture:
I've contacted the support and while being friendly, I'm still waiting for them to send me a new screw. I'll update this post when it's sorted out. Meanwhile, I think it's better to put the bent side of the screw up so the bending only affect a small build volume when printing.
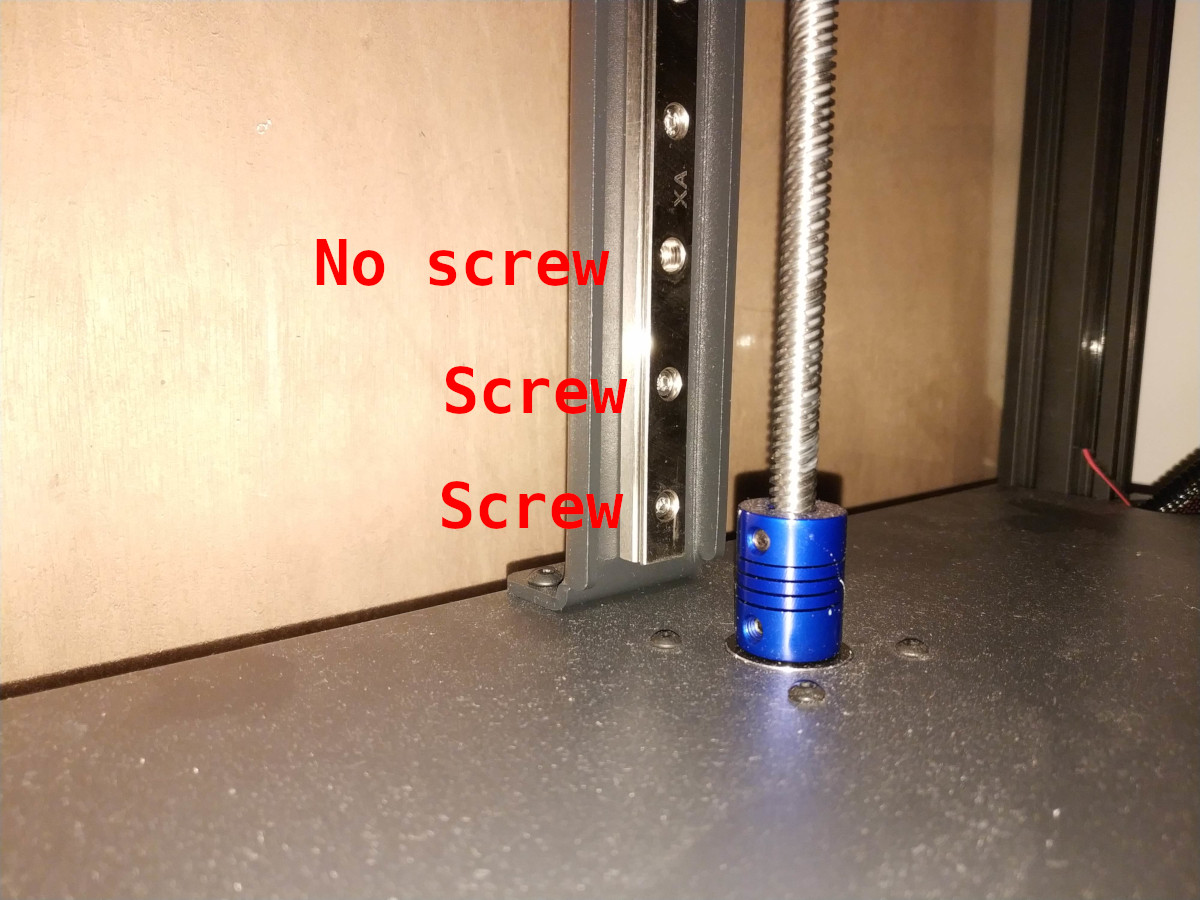
You'll need to take care of the screw's support orientation, as they are not symmetric. Keep the plastic plugs in until you're done with mounting them, since it prevents the trolley to escape. Look at the linear rail's screws to make sure you have the same orientation (on mine, I had 2 screws, 1 hole starting from the bottom):
You'll need to lubricate the screws with the provided lubricant tube. When you'll have installed the bed, you'll need to rotate the screw by hand multiple time along the complete range so it's perfectly lubricated (if you don't do this, it'll make horrible noise and you'll break your printer later on).
Step 5: Mounting the hotbed
If you have followed the upgrade post carefully and ordered a magnetic bed (unlike me at first, ahem...), you can glue the magnetic base instead of the blue PEI support. You'll need to screw all 4 spring screws midway or a bit more than midway. Later on, when leveling your bed, you'll have some margin on all sides to release/tighten the bed.