Common error to avoid while choosing and replacing a hotend
If you have followed my previous post, you know how to replace a 3D printer hotend.
Yet, I've made it multiple time and I'm now able to list the common errors to avoid, in the hope it'll save you time and money.
Error 1: Buying the cheapest clone of the hotend
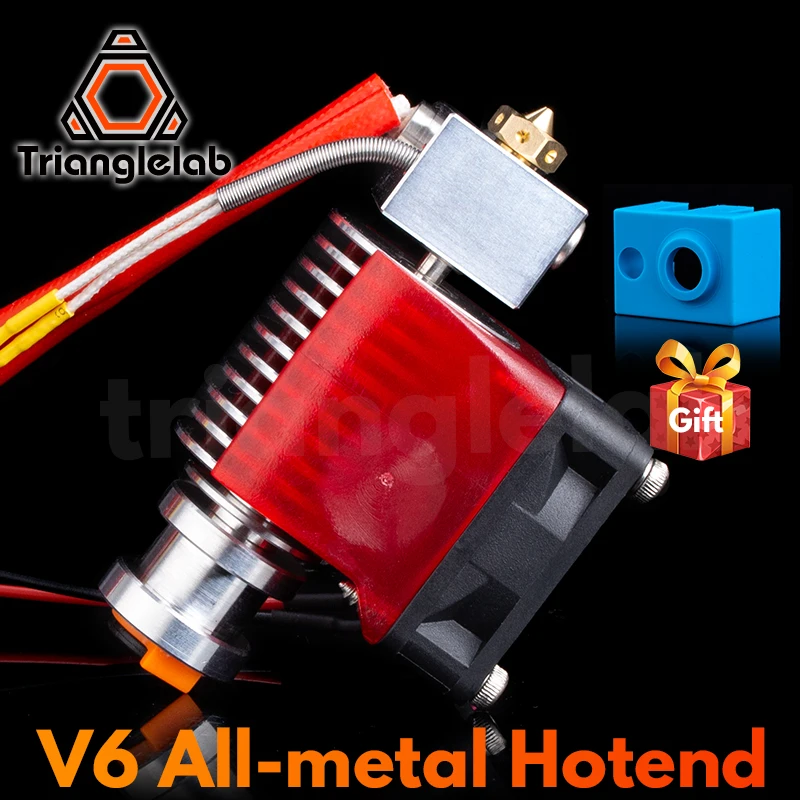
You've spent a lot of cash in the printer itself, (maybe you had many clogging) and you've read that the E3D v6 hotend is very reliable. Yet, spending 60€ on another hotend is just too much.
If you were to buy a E3D V6 clone hotend, please consider few things while selecting the clone. I'll not try to convince you that genuine E3D is best, since I'm not convinced myself.
I've listed few links on the bottom of this post for some hotends with a good price/quality ratio.
Yet, here are the few details you must check before buying:
The hotend voltage if sold with its heater
It must match the same voltage as your printer (either 12V or 24V). If your hotend is not of the right voltage, don't panic... yet, your current heater might fit inside the hotend's heater hole. If it does not, bad luck, you've wasted money by going cheap. In all cases, the heating power is engineered for the metallic mass of the hotend and its extrusion rate. So if you buy a 12V 30W heater and instead replace with a 24V 50W heater, the hotend will probably not be able to dissipate the excess heat, leading to too much softening of the filament inside the heat breaker and probable clogging of the filament when extruded.
The thermistor used to measure the temperature of the hotend
Avoid glass-bead thermistor like plague. Even more when their legs are simply fitted in a teflon tube that's maintained by a screw, like in this picture:

The glass-bead thermistor looks like this:
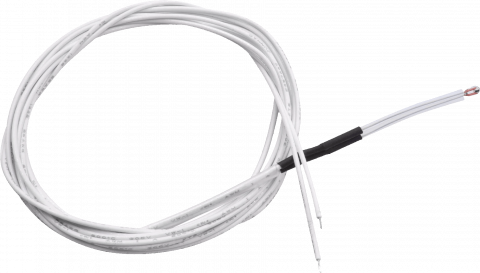
Such thermistor are prone to break while heating. If this happens, you have 2 possible hotcome:
- either it shorts itself (and in that case, the resistance of the wire is what the printer will measure and it'll interpret this value as a temperature, usually around
190 °Cfor a~ 4 Ohmwire), meaning that it'll turn the heater on without never turning it off - either it breaks the connection (reading infinite resistance, the firmware will interpret this as a
-40°Cor so, and will likely will halt the printer since it's below the minimum allowed temperature).
In the first case, this is very huge fire hazard
Even if they don't break, the screw can shortcut the wires if it's too tight (it happened to me) and this is exactly like the first case above. Hopefully, I was able to detect the smell and smoke of the burnt plastic and shut the printer in time.
Marlin's firmware has some safeguard against such behavior, but it can trigger too late even more when it happens after the hotend has reached temperature.
The thermistor beta value
Thermistors like PT100 are supposed to be 100 Ohm at 0°C with a positive resistance value (so the resistance will actually increase when temperature rises). For most 3D printer, the mounted thermistor are of NTC type (the resistance decreases when the temperature increases), with 100 KOhm at ambient temperature. However unlike PT resistor which are pretty linear, NTC resistor have a inverse exponential response, meaning that the resistance will fall almost to zero when reaching high temperatures. Since the curve is stored in the firmware (the printer interpolate/invert the curve to figure out the temperature), this means that the precision decreases when the temperature is increasing. The exponential curve is characterized by a beta value and using the wrong beta can have very bad to catastrophic results (depending on the temperature to reach).
It's very important to make sure the firmware used by your printer is matching the NTC's beta value. If it's not the case, you'll end up setting a temperature in the interface and getting a totally different temperature on the hotend with a wrong temperature being reported. In Marlin, you'll need to check the TEMP_SENSOR configuration value.
The typical curve looks like this:
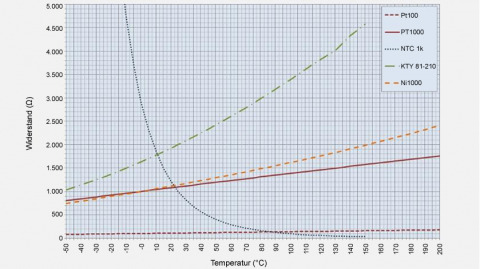
You'll find that a shorted NTC thermistor (few Ohms) behaves exactly like a thermistor at 200°C. Unfortunately, it's also the exact temperature where you'll likely print, so the scenario above will happen.
So, make yourself a favor, and buy a thermistor in a ceramic tube, so that it doesn't short itself:
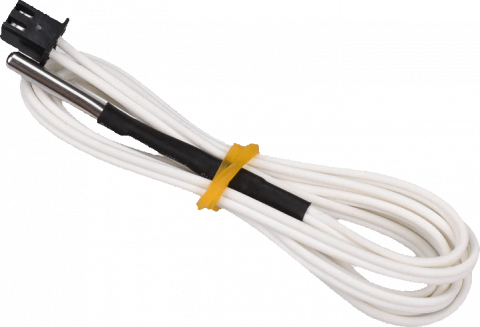
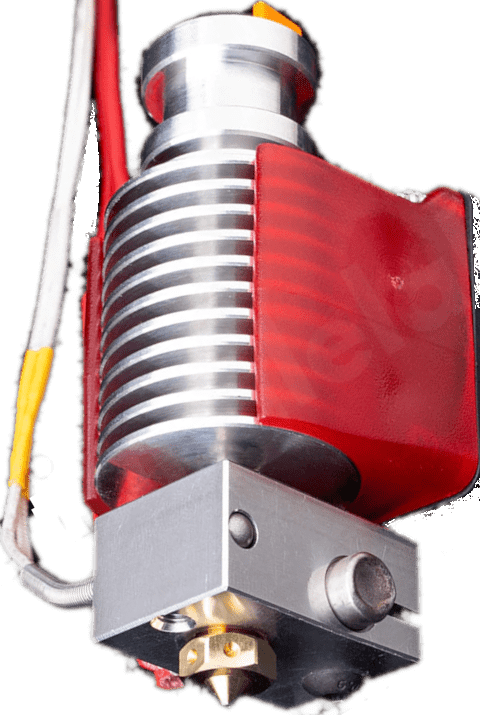
This also means use some hotend like this (notice the hole for the thermistor):
Error 2: Cutting and extending wires to the hotend because they are too short/too long
I've seen many times in numerous blogs around. It's bad, and it's a weakening point for your printer for these reasons:
- If you cut a wire, you are are creating a stress on the strands of copper. It's very likely you'll also cut few strands and this will reduce the current capacity of the wire. When the wire is a 18 AWG, it's not that bad, but it become problematic when it's a 22AWG or more.
- The insulation is important to avoid oxydizing the copper, and many bloggers solder the 2 wires and put electric tape around to isolate it. This means that you are adding a strong (non flexible point) on the wire that's only protected from oxydation by a layer of glue on the tape, and not everywhere. Since wires to the hotend are mechanically moving, the 2 points around the solder will flex more that the rest of the wire and likely break first.
- Cutting the 2 wires of a sensor/heater at the same position along the wire, so if it breaks, the exposed ends are more likely to touch. Imagine what would happen if the 2 wires of the heater were to touch inside the cable
So, for me, the best solution is to have a single cable containing many insulated wires that are plugged on a connector on the hotend, and have another connector for each sensor/actuator.
You should use a crimp tool since the connection is more durable and reliable and less likely to break due to fatigue. They are not that expensive and will definitively save your day (and crimping is a lot easier than soldering).
You can buy a 12 wires cable (search for 12G0.75mm2) or a 16 wire cable (16G0.5mm2) and you'll have plenty of wires left for future upgrade of your printer.
In a standard scenario, you'll need between 10 to 14 wires so a 16 wire cable will be enough and you'll able to merge 2 wires for lower resistance on the power lines.
A 0.75 mm2 wire (equivalent to AWG18) can handle 7A (take some margin and limit yourself to 4A, that's 96W on 24V or 48W on 12V) and a 0.5 mm2 wire (equivalent to AWG20) can handle 6A.
Error 3: Label your wires
Whatever the reason (we are always too late), you think you'll remember which wire is which. Except that once you've fitted all the wires in the cable or holder, you might make errors. For example, I swapped the hotend's heat breaker fan plug with the part cooling's fan. The former is usually always on, but the latter is only activated after few layers. This means that for the first few layers, the heat breaker wasn't cooled and the filament was being heated and started softening before being pressed in the hotend causing clog.
In the end, this stupid mistake took many additional hours to debug. Labeling takes few seconds so please label your wire (do whatever you want for labeling, use paint, eraser or tape, but label the wires). You can also buy wires that are already labelled.
Sponsored links
In order to pay for infrastructure cost for this blog, I'm listing some affiliated links about the hardware listed above.